
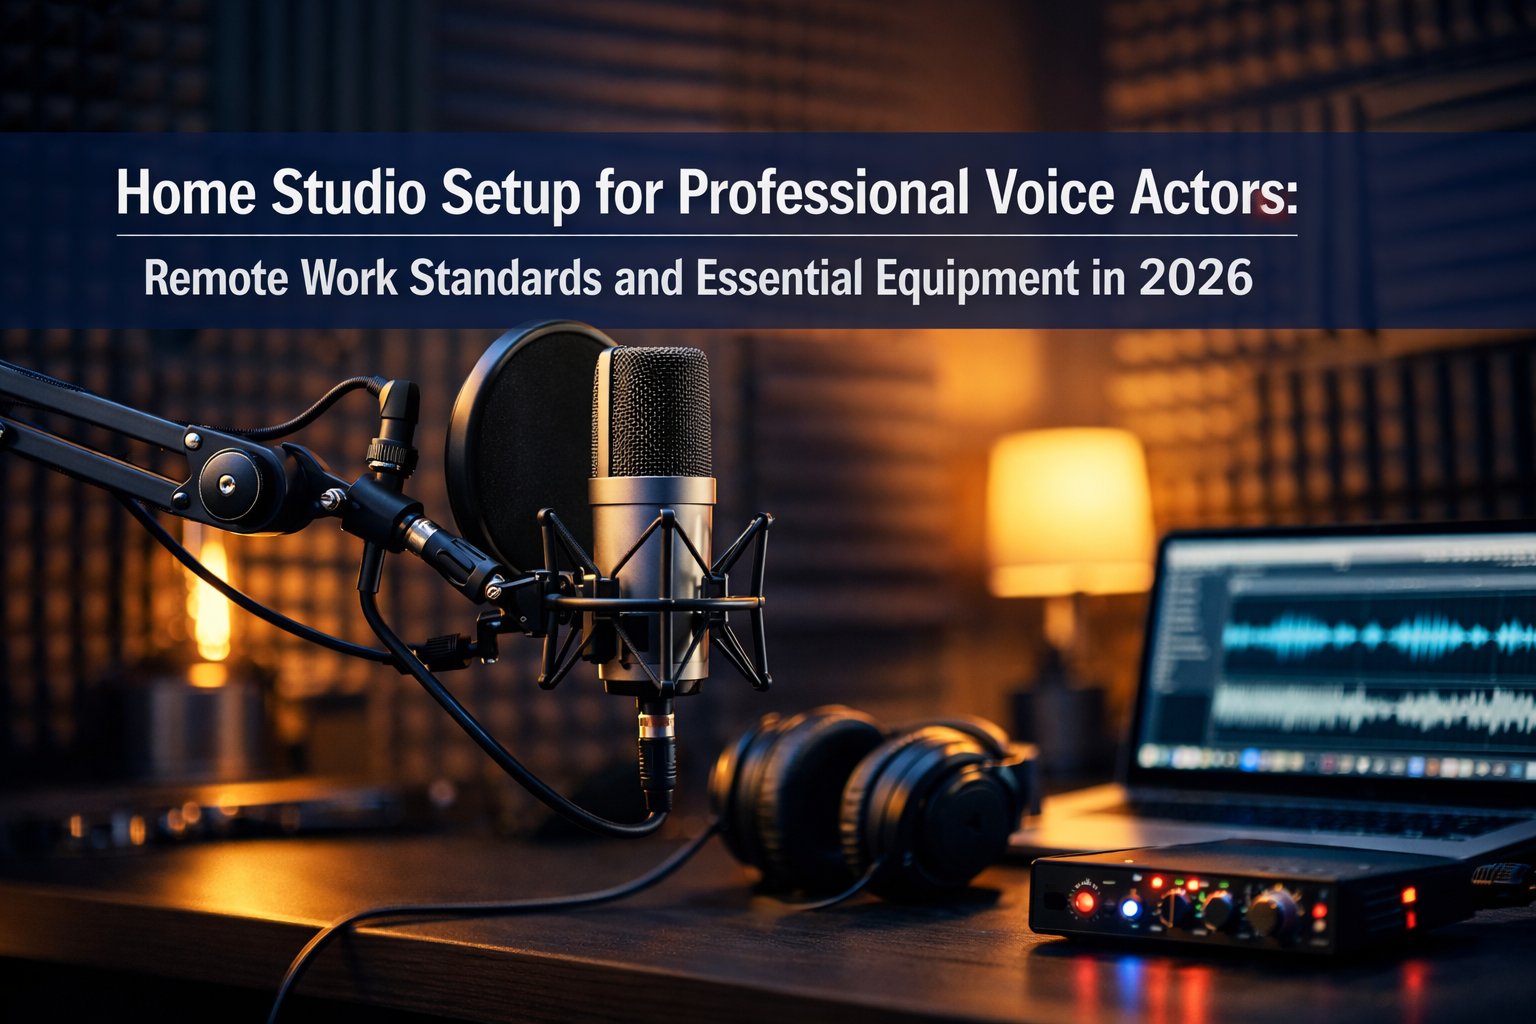
The voice acting industry has undergone a seismic shift. What was once a profession requiring daily commutes to professional recording studios has transformed into a predominantly remote career. In 2026, professional voice actors are expected to deliver broadcast-quality audio from their home studios, making the right equipment setup not just a convenience but an absolute necessity. Understanding the Home Studio Setup for Professional Voice Actors: Remote Work Standards and Essential Equipment in 2026 has become essential for anyone serious about competing in this rapidly evolving industry.
The remote work revolution accelerated this transformation, with clients now expecting voice talent to deliver pristine recordings within hours, not days. This comprehensive guide explores everything needed to build a professional-grade home recording environment that meets current industry standards, from foundational equipment to acoustic treatment strategies that ensure your recordings rival traditional studio output.
Key Takeaways
- Seven core components form the foundation of every professional voice acting home studio: computer, microphone, cables, audio interface, pop filter, microphone stand, and closed-back headphones
- Condenser microphones remain the industry standard for voiceover work in 2026, capturing vocal nuances better than dynamic alternatives in controlled home environments
- Acoustic treatment is equally important as equipment quality—bass traps, absorption panels, and DIY vocal booths dramatically improve recording quality in small spaces
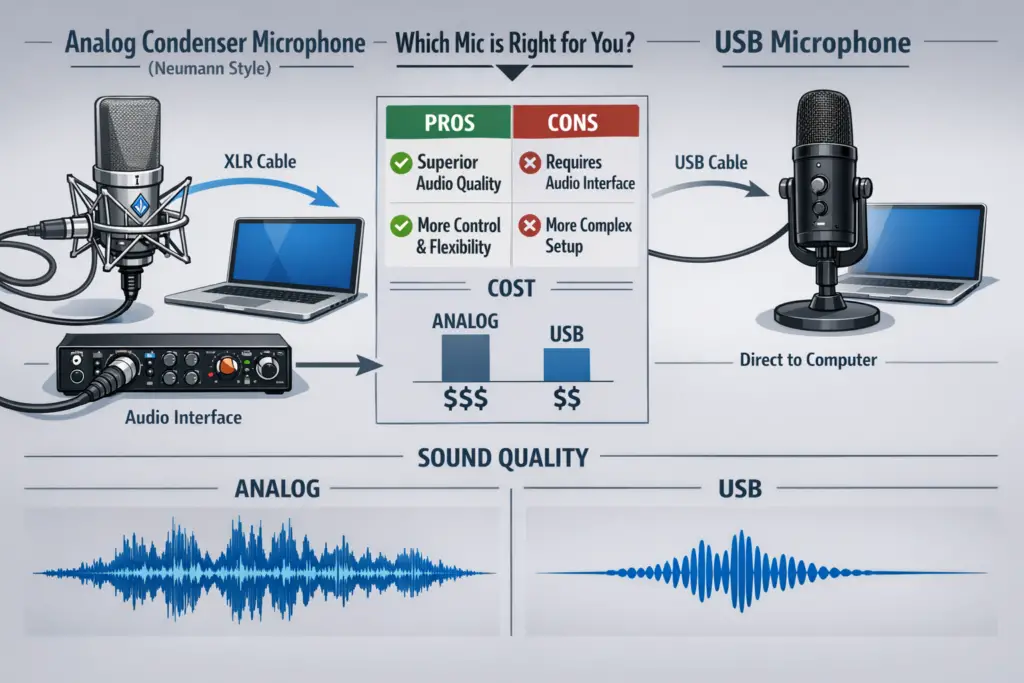
- USB versus analog microphones present a critical trade-off: USB models offer simplicity and lower cost, while analog setups deliver superior sound quality with additional investment
- Silent computer operation has become a priority, with Apple M1/M2 series computers preferred for their fanless or near-silent performance during recording sessions
The Foundation: Seven Essential Components for Your Voice Acting Studio
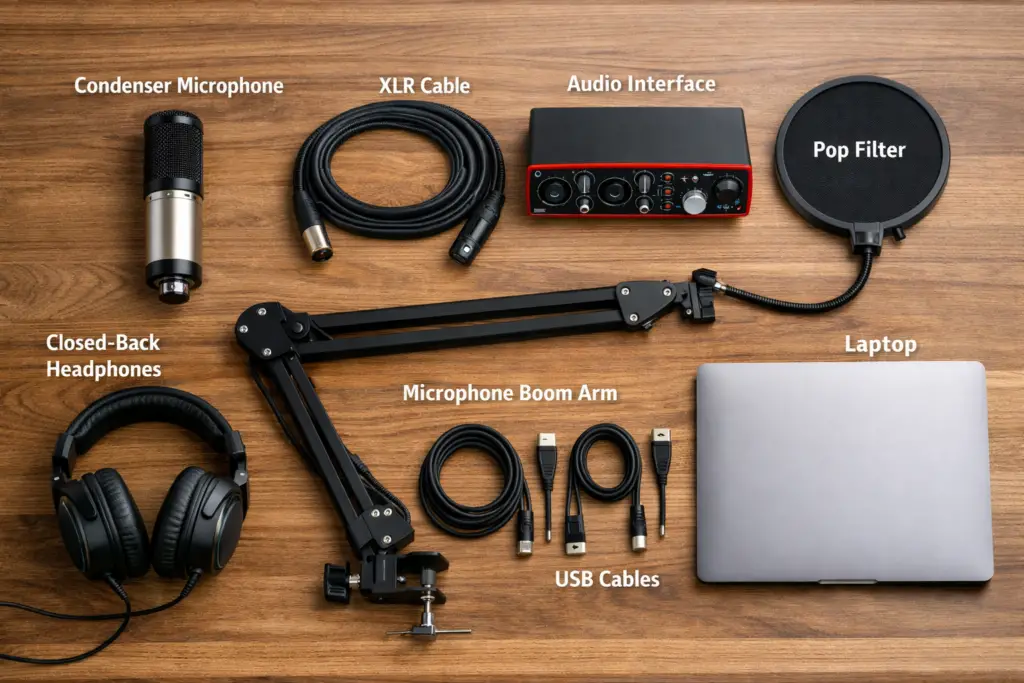
Building a professional home studio begins with understanding the core seven-item foundation that every voice actor needs. These components work together as an integrated system, and skipping any single element compromises the entire setup’s effectiveness[1].
Computer Requirements: Processing Power Without Noise
The computer serves as the central hub for recording, editing, and delivering finished audio files. In 2026, the minimum requirement includes at least 8 GB of RAM[5], though 16 GB or more provides better performance for complex editing sessions with multiple plugins and effects.
Older home office computers can be repurposed effectively if they meet this RAM threshold[5], making this an area where voice actors can potentially save money. However, one critical consideration has emerged: silent operation. Traditional computers with cooling fans create ambient noise that bleeds into recordings, requiring additional acoustic treatment or creative scheduling around fan cycles.
Apple M1 and M2 series computers have become the preferred choice among professional voice actors specifically because of their silent operation[3]. The MacBook Air features no internal fan whatsoever, while M1 and M2 MacBook Pros operate nearly silently in practice during typical voiceover recording sessions[3]. This silent operation eliminates a significant noise source that plagued earlier home studio setups.
Both Mac and PC platforms work effectively for voice acting, so the choice often comes down to personal preference, existing software investments, and budget considerations[1].
Microphones: The Heart of Your Sound Quality
The microphone represents the single most important investment in any voice acting studio. Condenser microphones have established themselves as the industry standard for voiceover work because they capture more voice qualities and perform optimally in quiet studio spaces[2].
Unlike dynamic microphones designed for live performance environments with background noise, condenser microphones excel at capturing the subtle nuances, breath control, and tonal variations that distinguish professional voice acting from amateur recordings[2].
Analog vs. USB: Understanding the Trade-Off
Voice actors face a fundamental decision when selecting their microphone: analog or USB. This choice involves important trade-offs that affect both budget and sound quality[1].
USB microphones plug directly into computers without requiring additional equipment. They’re less expensive overall and offer simplicity—perfect for voice actors just starting their home studio journey or those working with limited budgets. The convenience factor cannot be overstated: plug in, select the microphone in your recording software, and start recording.
Analog microphones require additional purchases, specifically an audio interface to convert the analog signal to digital. However, this added complexity delivers superior sound quality[1] that clients and casting directors can distinguish, especially in competitive audition situations. Professional voice actors working on high-end commercial, animation, or audiobook projects typically choose analog setups for this quality advantage.
Recommended Microphone Brands
Several manufacturers have earned reputations for producing reliable, professional-quality microphones suitable for voice acting work. Audio Technica, Rode, Neumann, and Shure[2] consistently appear in professional voice actor studios worldwide.
These brands offer options across various price points, from entry-level models around $200 to professional-grade microphones exceeding $3,000. The key is matching the microphone to your current career stage and budget while ensuring it meets minimum professional standards for your target market.
Audio Interfaces: The Bridge Between Analog and Digital
For voice actors choosing analog microphones, the audio interface (also called a sound card) becomes an essential component. This device converts the analog electrical signal from the microphone into digital data your computer can process and record[1].
Quality audio interfaces provide:
- Clean preamps that amplify the microphone signal without adding noise
- Phantom power (+48V) required by condenser microphones
- Low-latency monitoring so you can hear yourself in real-time without distracting delays
- Professional connectivity via XLR inputs and outputs
Entry-level interfaces suitable for single-microphone voice acting setups start around $100-150, while professional models with superior preamps and conversion quality range from $300-800.
Cables, Pop Filters, and Stands: The Supporting Cast
While less glamorous than microphones and computers, these supporting components significantly impact recording quality and workflow efficiency.
XLR or USB cables[1] connect your microphone to either the audio interface (for analog setups) or directly to the computer (for USB microphones). Quality cables with proper shielding prevent interference and ensure reliable signal transmission. Budget $20-50 for professional-grade cables.
Pop filters prevent plosive sounds (hard “P” and “B” sounds) from creating distortion-causing air bursts against the microphone diaphragm[1]. These inexpensive accessories ($10-30) attach between the voice actor and microphone, dramatically improving recording quality with minimal investment.
Microphone stands come in three primary configurations[2]:
- 🎤 Adjustable floor stands offer variable height positioning and work well for both sitting and standing performance
- 🎤 Desktop microphone arms attach to desk surfaces, providing flexible positioning while saving floor space
- 🎤 Desktop stands maintain fixed positions on desk surfaces, offering the most compact footprint
Most voiceover talent perform standing[2], as this posture provides better breath control and vocal projection. However, all three stand options accommodate both sitting and standing positions depending on the performance requirements and personal preference.
Headphones: Monitoring Without Compromise
Closed-back headphones represent the final essential component in the seven-item foundation[1]. The “closed-back” specification is non-negotiable—open-back headphones allow sound to leak from the ear cups, which the microphone picks up and records as unwanted background noise.
Professional voice actors use headphones to:
- Monitor recording quality in real-time
- Hear direction from remote clients during live sessions
- Review takes immediately after recording
- Edit with accurate frequency representation
❌ Noise-canceling headphones should be avoided for professional voice acting work[1]. While excellent for listening to music or blocking airplane noise during travel, noise-canceling technology introduces audio processing that colors the sound, preventing accurate monitoring of recording quality.
Recommended Headphone Models and Price Points
The Audio-Technica ATH-M series has become an industry standard for voice acting work, with models including the ATH-M20, M30, M40, and M50 ranging from $50-150[4]. These closed-back studio monitors provide accurate frequency response without the coloration that consumer headphones add to make music sound more pleasing.
The ATH-M50 represents the professional standard, offering exceptional detail and accuracy for around $150. Budget-conscious voice actors can start with the ATH-M20 or M30 models and upgrade as their careers progress.
Acoustic Treatment: Transforming Spaces for Professional Sound Quality
Even the most expensive microphone cannot compensate for poor room acoustics. In 2026, understanding acoustic treatment has become as important as equipment selection for voice actors building home studios. The goal is creating a controlled recording environment that minimizes reflections, resonances, and ambient noise.
Understanding Frequency-Specific Treatment
Sound waves behave differently based on their frequency. Low frequencies (bass) require different treatment approaches than mid and high frequencies (treble). Professional acoustic treatment addresses each frequency range with specialized materials and placement strategies.
Bass Traps: Controlling Low-Frequency Resonances
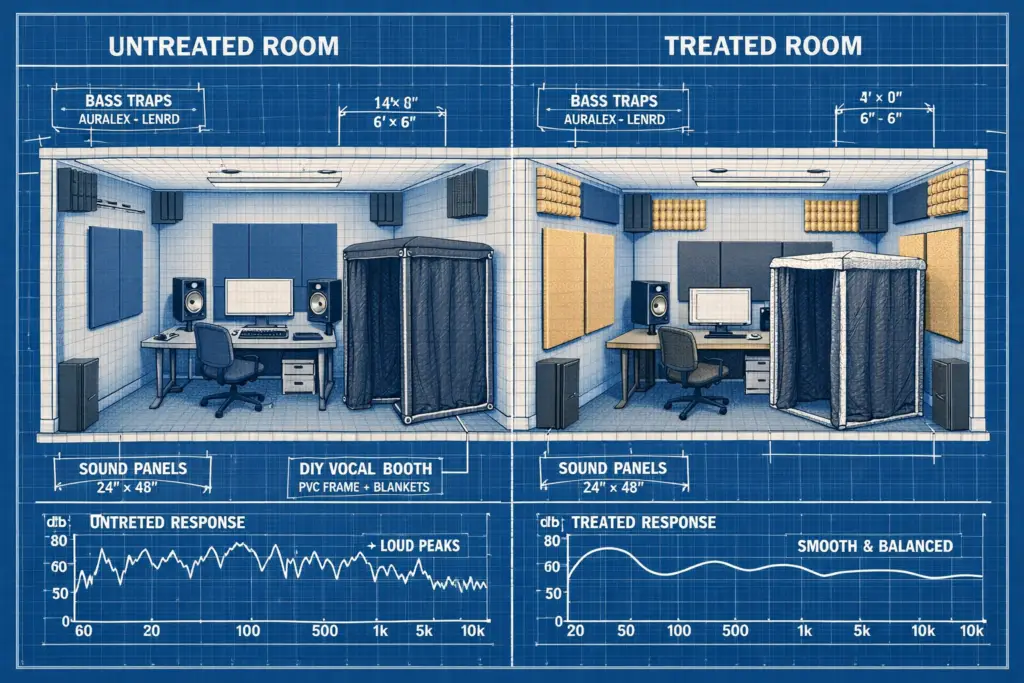
Small recording spaces suffer particularly from low-frequency resonances—standing waves that create uneven bass response and muddy recordings. Bass traps specifically target these problematic frequencies[3].
The Auralex LENRD (Lenrd stands for “Low-End Node Reduction Device”) modules measuring 24″ × 12″ × 12″ are specifically recommended for dampening low-frequency issues in small recording spaces[3]. These triangular foam modules install in room corners where low-frequency energy accumulates most intensely.
Proper bass trap placement creates a more even frequency response, resulting in recordings that translate well across different playback systems—from smartphone speakers to professional studio monitors.
Sound Absorption Sheets and Dampening Blankets
Mid-to-high frequency control requires different materials than bass traps. Sound absorption sheets and dampening blankets address these frequencies effectively[3], preventing the reflections that create the “roomy” or “echoey” quality that immediately identifies amateur recordings.
These materials work by converting sound energy into heat through friction within the material’s fibers. Strategic placement on walls, particularly the first reflection points (the wall areas where sound bounces directly from the voice actor to the microphone), dramatically improves recording quality.
DIY Vocal Booth Solutions
Professional isolation booths cost thousands of dollars and require dedicated space many home-based voice actors don’t have. Soft-walled vocal booths built with PVC frames and heavy moving blankets provide a cost-effective DIY approach[3] that delivers professional results.
This approach involves:
- Constructing a PVC pipe frame (approximately 4′ × 4′ × 6′ tall) using standard plumbing components from hardware stores
- Hanging heavy moving blankets (the thick padded type used by professional movers) on all sides except the entrance
- Adding acoustic foam to the interior walls for additional high-frequency absorption
- Installing the microphone and stand inside the booth for isolated recording
The total cost typically ranges from $200-400, depending on materials chosen and booth size. While not as effective as professional isolation booths costing $3,000-8,000, these DIY solutions provide 80-90% of the benefit at a fraction of the cost.
Strategic Acoustic Treatment Placement
Effective acoustic treatment isn’t about covering every wall surface with foam. Strategic placement based on acoustic principles delivers better results with less material and expense.
Priority treatment locations include:
- Corner bass traps in all four vertical corners from floor to ceiling
- First reflection points on side walls where sound bounces from voice actor to microphone
- Wall behind the microphone to prevent reflections back toward the diaphragm
- Ceiling above the recording position if room height allows
Many voice actors make the mistake of over-treating their spaces, creating overly “dead” rooms that sound unnatural. The goal is controlled acoustics, not complete sound elimination.
Advanced Considerations: Optimizing Your Home Studio Setup for Professional Voice Actors
Beyond the foundational equipment and basic acoustic treatment, several advanced considerations separate adequate home studios from exceptional professional setups that consistently book high-paying work.
Recording Software and Digital Audio Workstations (DAWs)
While not part of the core seven-item foundation, Digital Audio Workstation (DAW) software is essential for recording, editing, and delivering finished audio files. Popular options for voice actors include:
- Audacity (free, open-source, excellent for beginners)
- Adobe Audition (industry standard, subscription-based, comprehensive editing tools)
- Reaper (affordable one-time purchase, professional features)
- Pro Tools (industry standard for professional studios, higher learning curve)
The choice of DAW matters less than proficiency with whichever platform you select. Clients care about the quality of delivered audio, not which software produced it.
Backup Systems and Redundancy
Professional voice actors in 2026 implement backup systems to prevent disaster scenarios. Equipment failures, hard drive crashes, or software glitches shouldn’t derail careers or client relationships.
Essential backup strategies include:
- 💾 Automated cloud backup of all project files and finished recordings
- 💾 External hard drive backup maintained separately from the primary computer
- 💾 Backup microphone (even an inexpensive USB model) for emergencies when primary equipment fails
- 💾 Backup recording software installed and configured for quick activation
The cost of implementing these redundancies is minimal compared to the potential loss of client relationships or missed booking opportunities when equipment fails at critical moments.
Internet Connectivity and Remote Session Capabilities
Remote live directed sessions have become standard practice in 2026. Clients expect voice actors to connect via platforms like Source Connect, SessionLinkPRO, or Zoom for real-time recording sessions with immediate feedback and direction.
Reliable high-speed internet is non-negotiable. Minimum recommended speeds include:
- Download: 25 Mbps or higher
- Upload: 10 Mbps or higher (upload speed particularly important for sending audio in real-time)
- Latency: Under 50ms for comfortable real-time conversation
Hardwired Ethernet connections provide more stable performance than Wi-Fi for professional remote sessions. Voice actors should test their connection quality and have backup internet options (mobile hotspot, backup ISP) available for critical sessions.
Continuous Learning and Technical Proficiency
The Home Studio Setup for Professional Voice Actors: Remote Work Standards and Essential Equipment in 2026 extends beyond physical equipment to include technical knowledge. Professional voice actors must understand:
- Basic audio editing (removing breaths, mouth clicks, and background noise)
- File format specifications (WAV vs. MP3, sample rates, bit depth)
- Noise reduction techniques (using software tools appropriately without over-processing)
- Delivery specifications (understanding client requirements for file naming, format, and transfer methods)
These technical skills directly impact booking rates and client satisfaction. Voice actors who deliver clean, properly formatted audio files with minimal revision needs command higher rates and receive repeat bookings.
Ergonomics and Sustainable Performance
Voice acting careers span decades, making ergonomic considerations important for long-term sustainability. Home studio design should accommodate:
- Proper microphone height (whether standing or sitting) to maintain healthy posture
- Monitor positioning for script reading without neck strain
- Adequate lighting to read scripts comfortably without eye fatigue
- Climate control to maintain consistent temperature and humidity (protecting both equipment and vocal health)
Professional voice actors treat their home studios as long-term investments in their careers, not just collections of equipment.
Budget Planning: Investment Strategies for Different Career Stages
The Home Studio Setup for Professional Voice Actors: Remote Work Standards and Essential Equipment in 2026 requires financial investment, but the total amount varies significantly based on career stage, target markets, and existing equipment.
Entry-Level Budget ($500-800)
Voice actors just starting their careers or testing the profession can build functional home studios for $500-800:
| Component | Budget Option | Approximate Cost |
|---|---|---|
| Computer | Existing computer with 8GB+ RAM | $0 (repurposed) |
| Microphone | Audio-Technica AT2020 USB | $100-130 |
| Cable | Included with USB microphone | $0 |
| Audio Interface | Not needed (USB microphone) | $0 |
| Pop Filter | Generic nylon pop filter | $10-15 |
| Microphone Stand | Desktop boom arm | $30-50 |
| Headphones | Audio-Technica ATH-M20x | $50-60 |
| Acoustic Treatment | DIY moving blanket booth | $200-300 |
| Recording Software | Audacity (free) | $0 |
| Total | $390-555 |
This entry-level setup delivers professional-quality recordings suitable for most commercial, e-learning, and audiobook work. The primary limitation is the USB microphone, which can be upgraded later as the career develops.
Mid-Level Professional Budget ($1,500-2,500)
Established voice actors with consistent bookings typically invest $1,500-2,500 for improved quality and reliability:
| Component | Professional Option | Approximate Cost |
|---|---|---|
| Computer | Apple MacBook Air M2 (silent) | $1,000-1,200 |
| Microphone | Rode NT1 (analog condenser) | $250-280 |
| Cable | Professional XLR cable | $25-35 |
| Audio Interface | Focusrite Scarlett 2i2 | $180-200 |
| Pop Filter | Professional metal pop filter | $30-40 |
| Microphone Stand | Adjustable floor stand with boom | $80-120 |
| Headphones | Audio-Technica ATH-M50x | $140-160 |
| Acoustic Treatment | Bass traps + absorption panels | $300-400 |
| Recording Software | Adobe Audition (annual) | $240/year |
| Total | $2,245-2,675 |
This mid-level setup provides broadcast-quality recordings that meet the highest industry standards, with silent computer operation and professional analog signal chain.
High-End Professional Budget ($4,000-6,000+)
Top-tier voice actors working on premium commercial, animation, or audiobook projects often invest $4,000-6,000 or more:
- Neumann TLM 103 microphone ($1,100-1,200)
- Universal Audio Apollo Twin interface ($700-900)
- Professional acoustic treatment with custom bass traps and panels ($800-1,200)
- Backup equipment (secondary microphone, interface, computer) ($1,000-1,500)
- Professional isolation booth or custom-built studio room ($2,000-5,000+)
These investments make sense for voice actors earning $50,000+ annually from voiceover work, where the improved quality and reliability directly impact booking rates and client satisfaction.
Conclusion: Building Your Professional Voice Acting Future
The Home Studio Setup for Professional Voice Actors: Remote Work Standards and Essential Equipment in 2026 represents both a financial investment and a commitment to professional excellence. The remote work revolution has permanently transformed the voice acting industry, making home studios not just convenient alternatives but essential business infrastructure.
Success in this evolved landscape requires understanding that equipment alone doesn’t create professional recordings. The combination of quality gear, proper acoustic treatment, technical proficiency, and continuous skill development separates voice actors who struggle from those who thrive.
Actionable Next Steps
Ready to build or upgrade your professional voice acting studio? Follow these concrete steps:
Assess your current situation – Inventory existing equipment that can be repurposed (computer, headphones, furniture)
Define your budget tier – Choose entry-level ($500-800), mid-level ($1,500-2,500), or high-end ($4,000+) based on current career stage and financial capacity
Prioritize the seven essentials – Ensure your setup includes all core components: computer, microphone, cables, audio interface (if analog), pop filter, stand, and closed-back headphones
Address acoustics immediately – Don’t wait to treat your recording space; even basic DIY solutions dramatically improve recording quality
Test and compare – Record samples with your setup and compare against professional voiceover samples in your target market to identify gaps
Invest in education – Allocate budget not just for equipment but for courses, coaching, and technical training that maximize your investment
Plan for upgrades – Create a roadmap for equipment improvements as your career develops and revenue increases
Build redundancy – Implement backup systems before equipment failures create client relationship problems
The voice acting industry in 2026 offers unprecedented opportunities for talented performers willing to invest in professional home studio infrastructure. The barrier to entry has never been lower, but the quality standards have never been higher. Voice actors who understand and implement proper Home Studio Setup for Professional Voice Actors: Remote Work Standards and Essential Equipment in 2026 position themselves for sustainable, profitable careers in this dynamic industry.
Your voice is your instrument. Your home studio is the concert hall where that instrument performs. Invest wisely, learn continuously, and deliver consistently. The remote work revolution has created opportunities for voice actors worldwide—ensure your home studio setup enables you to seize them.
References
[1] Create Home Voiceover Studio Pro – https://www.sagaftra.org/create-home-voiceover-studio-pro
[2] Home Studio Equipment Checklist – https://www.suchavoice.com/blog/2022/08/04/home-studio-equipment-checklist/
[3] Gear – https://justaskjimvo.studio/gear/
[4] Essential Voiceover Gear – https://www.jaymyersvoiceover.com/blog-ideas/essential-voiceover-gear
[5] Watch – https://www.youtube.com/watch?v=XsTszOmYTg0